
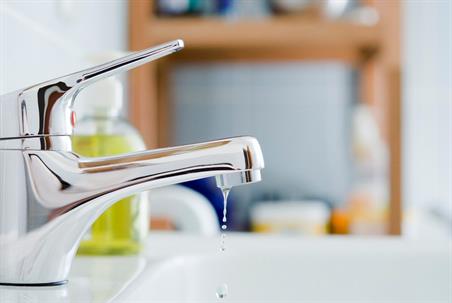
Are you hearing the drip-drip-drip of a faucet that has long been turned off? While far from a top priority, nuisances like this can affect your bottom line and, frankly, your sanity. When dealing with complex plumbing problems, it is best to leave it to the professionals—as they have the expertise and tools to handle the intricacies of your home’s plumbing system. However, certain projects require only a handful of tools and can be handled quickly and easily. One such project is diagnosing the dreaded leaky faucet.
Determining why your faucet is leaking starts by identifying the type of faucet you have. The four most common types are:
- Compression: This two-handled faucet has been around the longest and is slowly being replaced by cartridge faucets. While these faucets are often the cheapest in upfront prices, they tend to need more maintenance than the other systems.
- Cartridge (sleeve): Unfortunately, this two-handled faucet can look identical to a compression faucet—so you’ll have to ID this faucet by feel. When you use the handles, is the action smooth and consistent? If so, chances are it is a cartridge faucet. A compression faucet will feel like you are tightening (compressing) the handle to turn off the water.
- Ceramic disk: These modern sinks very rarely need repairs but can be identified by a single lever on top of a wide cylinder body. The name comes from the addition of two ceramic disks located at the bottom of the chamber, and they control the flow of water.
- Ball: Common in kitchen sinks, this type of faucet is identified by the single handle that moves on a rounded cap located above the base of the spout.
Once you have identified the type of faucet you have, it is critical to turn off the water supply valve under the sink before you get started. If there is no individual shutoff valve, you will need to shut off the water supply to the house. This step will ensure that none of your sinks turn into a geyser in the middle of your project. It is also a good idea to plug your drain before starting—no one wants to spend their Saturday searching for a screw dropped down the drain.
Now that your faucet is identified, your water is off, and your drain is plugged, it is time to get down to business.
Fixing a Leaky Compression or Cartridge Faucet
For leaks in compression and cartridge faucets, you are most likely dealing with two culprits: either a damaged O-ring or a worn-out washer (and sometimes, a combination of the two). Both parts are readily accessible at any hardware store, inexpensive, and even come with a set of directions for replacement.
To replace your O-ring and/or washer, begin by removing the handles. If there is a decorative cap on the handles, pry it off using a flat screwdriver before loosening the screw underneath with a Phillips head. Once the handle is removed, use a crescent wrench to unscrew the packing nut—this will give you access to the stem. Gently pull up and inspect the stem, O-ring, and washer.
The O-ring and washer can be cleaned with a damp rag to remove any buildup. If that seems to be the extent of the damage, coat the parts in heat-proof plumber’s grease and put them back on the stem. However, if either of these parts seems broken, cracked, corroded, or stretched out, you will need to replace them. This is easiest by bringing your old parts to the hardware store, so you can buy an exact fit. From there, grease your parts, attach them back to the stem, and replace the packing nut and handle. Voila!
Fixing a Leaky Ball Faucet
Ball faucets are a bit more complex than compression faucets—and identifying the cause of a leak is less cut and dry. To save yourself time, we recommend purchasing a complete replacement kit. These kits are easy to find at the hardware store and come with installation instructions and a specialized tool for removing the faucet cam.
Fixing a Leaky Ceramic Disk Faucet
Like we mentioned earlier, ceramic disk faucets don’t usually require extensive repairs. However, issues can arise when the neoprene seals in the cylinder develop mineral (scale) buildup.
To access the seals, you will need to push the handle back to expose the set screw. Once the screw is removed, lift off the handle and remove the escutcheon cap (also known as a cover plate). From there, you will be able to unscrew the mounting screws and lift out the cylinder to inspect the neoprene seals. If any buildup is present, it is easiest to remove it using some distilled white vinegar and a plastic scouring pad. Remember to rinse the seals thoroughly before replacing them.
Once you have replaced and reassembled the faucet, it is important to turn the handle to the “on” position before very slowly turning the water back on—if you turn the water back on too quickly, the force of the water could crack your ceramic disks.
“What If It is Still Leaking?”
If your faucet is still leaking after you have thoroughly inspected the parts, or your faucet is leaking in multiple locations, you might need to replace the entire thing. There is no need to be intimidated by this process. Your local plumbers can offer recommendations and installations that are reliable and speedy.
If you are experiencing plumbing issues and looking for a plumber in the Virginia or Maryland area, contact us today to request an appointment.